| Sandridge Saddlery |
- Saddle Info - Wither Tracings |
Return to: Saddle Info |
| Wither Tracings |
| Wither tracings, when done correctly, can be a very helpful tool when trying to fit saddles from a distance, and are usually required when ordering custom saddles. When combined with photographs, they provide a 'measureable' picture of the horse's back to aid in saddle selection. |
Step-by-Step Wither Tracing
| Preparation - What you will need: | |
| 1) Your Horse 2) A quiet, well-lit area 3) An assistant to hold the horse 4) Chalk, a grease pencil, or tape 5) A large piece of paper and a pen or ink marker 6) A Flexible Curve (available at office-supply stores) or malleable wire. Coat hangers do not, as a rule, work well - they are too stiff and tend to spring out of shape as soon as you lift them from the< horse's back. 7) These instructions |
 Flexible Curve |
| Step 1 - Outline the shoulder blades | |
| A saddle that does not pinch or inhibit the movement of the shoulder will allow the most expressive action and allow the horse to work in comfort. | |
 Fig.1 Fig.1 | |
| Using chalk, a grease pencil, or even tape, mark the outline of the horse's shoulder blade (scapula)(Fig.1). If you run your fingers flat across it at the widest point, you will feel the edge as it drops off. The rear edge of the shoulder blade is the starting point for a wither tracing. | |
| Step 2 - Lift the back | |
| In training, we encourage the horse to shift his weight on to the hindquarters and lighten his forehand - improving balance, strength and movement. As he reaches further under himself, the horse tightens the belly muscles, which raises the back. | |
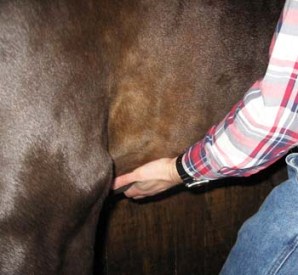 Fig.2 |
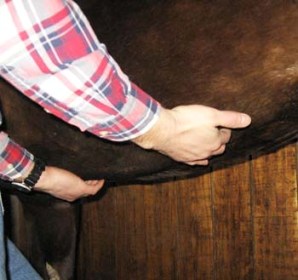 Fig.3 |
| When choosing a saddle, we want to end up with one that will be comfortable when the horse goes correctly - one that will allow the horse to raise his back to it when using his hind end. In an effort to simulate the shape of the back when working properly, encouraging the horse to lift his back a bit before doing the measurements is helpful. Gently prodding the horse with your fingers at the center of the girth line (Fig.2) and about 18" further back (Fig.3) will normally cause him to tighten the belly muscles and arch the back to give a more useful shape to trace. (This exercise should be introduced gently and slowly). | |
| Compare figures 4 and 5 to see the smoother joining of the wither to the back (A), the tighter belly shown by a straighter underline (C), and less angle at the top of the rump (B) because the loin has lifted. | |
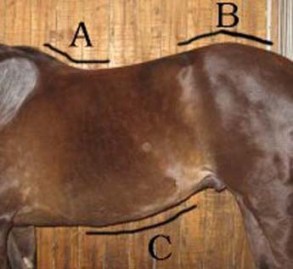 Fig.4 |
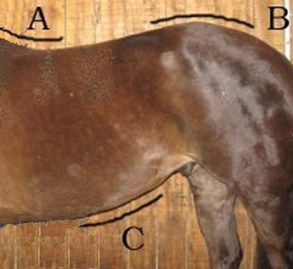 Fig.5 |
| Step 3 - Trace the Back | |
| The first tracing is taken about 2 1/2" behind the shoulder blade, where the points of the saddle tree will rest. This will indicate the width of tree required.(Fig.6) Center the flexi-curve (shown here is a saddler's measuring tool) across the back at -A- with the arms perpendicular to the ground.(Fig.7) Gently mold the arms of the curve to follow the contour of the horse's body. | |
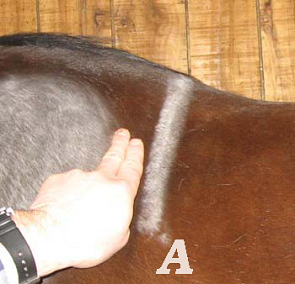 Fig.6 |
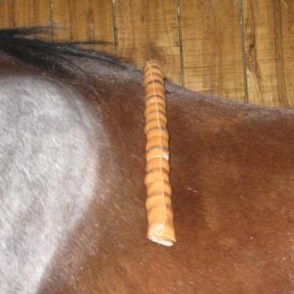 Fig.7 |
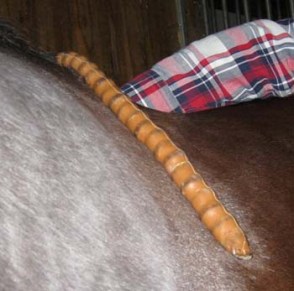 Fig.8 |
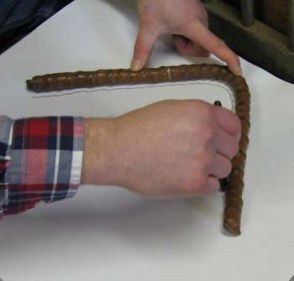 Fig.9 |
| Carefully lift the curve off the back and lay it on your paper, then trace the underside of the curve on to the paper.(Fig.9) | |
| Step 4 - More Back Tracings | |
| Marks for points -B- and -C- are made on this horse about 5" apart, corresponding roughly with the mid-point of the back and the last rib.(Fig.10) Fig.11 illustrates how the tracings should correspond to the points of the tree, and to the middle and the rear of the seat. | |
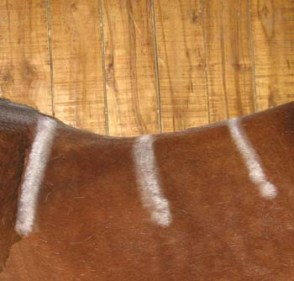 Fig.10 |
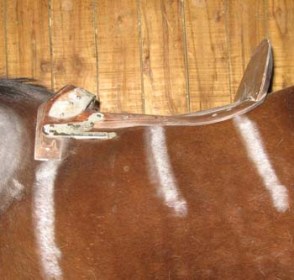 Fig.11 |
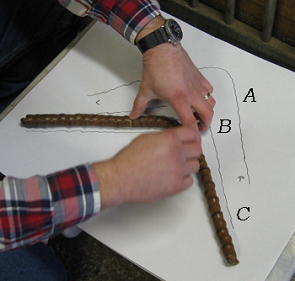 Fig.12 | |
| Tracings of points -B- and -C- are made and added to the paper. Be sure to mark which are the Left and Right sides of the horse, and whether the line is -A-, -B-, or -C-(Fig.12) | |
| Step 5 - Final Steps | |
| The final tracing is of the wither and spine. Lay the flexi-curve along the horse's back and mold it to this shape.(Fig.14). The 'X' marks where the spine tracing intersects wither tracing 'A'. Trace the underside of the curve on to the paper (Fig.14). Remember to mark on the -D- line (spine) where line -A- intersected it on the horse. | |
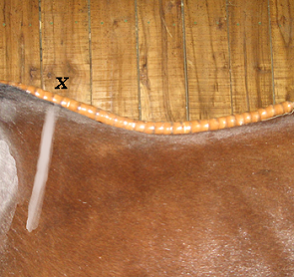 Fig.13 |
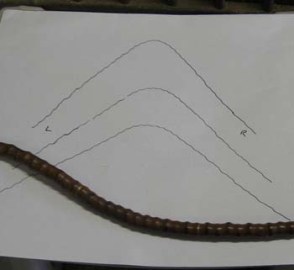 Fig.14 |
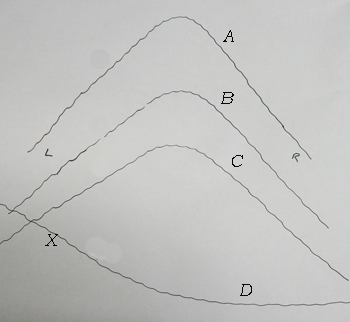 Fig.15 | |
| Fig.15 shows the final product, which includes back tracings -A-, -B-, -C-, and the wither and spine, -D-. The 'X' shows where tracing -A- was taken. | |
| Additional Information |
| On the back of the drawing, you should include your name, address and contact numbers; the name of the horse, his type, age and height; and the type of saddle you are looking for. If the saddle-fitter has not seen your horse, you should try to include any information that may be pertinent to saddle fit - for example, if the horse is under weight, out of condition, has had an injury, or is very young - the back can be quite a different shape from what it should/will be. The horse in the photos might be described as follows: 15.2 h. 9 year old Quarter Horse gelding doing flatwork and jumping 5 days a week; competing at pre-training level eventing. He's in good shape, no specific back or physical problems, but he is built croup-high and saddles tend to sit too low in the back, often 'bridging'. |
| Back to: Products - Saddles - Saddle Info |